
Skip Christ the Redeemer on your first trip if your goal is a single, show-stopping photo. I know that sounds blasphemous for anyone itching to photograph Rio, but hear me out: the statue is one of the world’s most photographed icons, and the classic postcard angle is heavily crowded, usually backlit by harsh midday sun, and often sold already in thousands of Instagram posts. If your aim is signature brazilian photography rather than just a sticker on your timeline, you’ll do better chasing views, angles and light that make an image feel personal rather than borrowed.
Why the counterintuitive move pays off
When you bypass the predictable, you force yourself to explore neighborhoods, viewpoints and even other states. The result: photos with context — fishermen’s boats in Salvador, sand ripples in Lencois Maranhenses, misty peaks framing a tiny chapel in the Serra Gaúcha — not just another statue shot. That’s the difference between a tourist photograph and work you’d want to print.
The checklist I shoot from
I travel light and deliberate. A mid-frame or full-frame camera, a wide zoom (16–35mm or 24–70mm), a medium tele (70–200mm), and a small travel tripod. A polarizer, neutral density for long exposures at waterfalls and coastal surf, and two fast SD cards. I keep a copy of local transit apps and the address of the police station in each city — street photography in Rio or Salvador benefits from confidence and local knowledge. Each of the 15 locations below includes the specific moment and gear that helps me get there.
The 15 shots — locations, angles, and the exact moments to chase
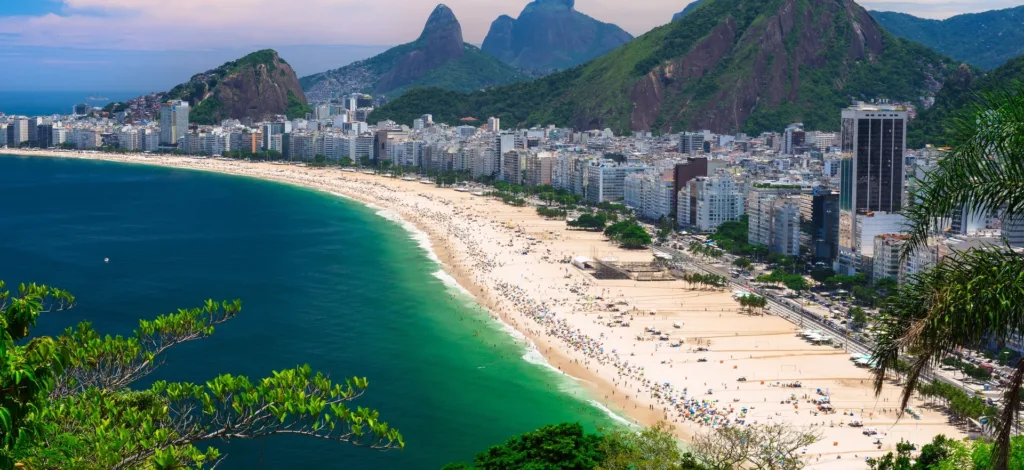
1) Sugarloaf silhouette at sunrise — Copacabana vantage
Why photographers keep going back: Sugarloaf (Pão de Açúcar) slices the skyline into a foreground/backdrop relationship that reads quickly in an image. The iconic silhouette works best at sunrise when the city is quiet and the light paints the granite. I usually position myself on Copacabana beach, around the lanes between Posto 2 and Posto 4, where you can get the curve of the beach leading to Sugarloaf with wet sand reflections right after the tide retreats.
Gear and settings: 24–70mm around 35mm for context, polarizer to deepen the sky, tripod if you want long exposures to smooth the water. Shoot bracketed exposures for HDR if the sky is dramatic.
2) Favela detail — texture and color from a safe community project tour
Forget the cliché “poverty porn.” The most compelling favela photos come from taking a community-led photography tour: you get access, you meet people, and your images gain dignity. Look for architectural textures, stairways that resemble terraces, laundry lines, painted murals and windows framing small altars. Shoot tight — 35mm or 50mm — to honor faces and details without sensationalizing circumstances.
3) Christ the Redeemer from Mirante Dona Marta at blue hour
All right, you didn’t skip it forever. If you must photograph Christ the Redeemer, do it from Mirante Dona Marta at blue hour — the statue is distant but perfectly placed, with the city unfolding beneath. The light is softer, crowds are smaller earlier than on Corcovado itself, and you avoid the hard midday contrast that flattens everything.
Tip: use a 70–200mm to compress the scene and make the statue and Sugarloaf feel close together. A long exposure (1–3 seconds) with a stable tripod will smooth city lights into ribbons beneath the statue.
4) Lencois Maranhenses ribbon lagoons from a dune crest
There’s nothing quite like walking across white sand dunes and finding small, impossibly blue lagoons scattered like sapphires. Shoot from a dune crest at midday when the sun lights the sand and lenses render the lagoons in saturated blues. Aerials are tempting, but a low, wide-angle from a crest lets you use the rippled sand foreground to lead the eye into the lagoons.

5) Pelourinho colors at golden hour — Salvador’s historic center
Salvador’s Pelourinho is a riot of color, colonial facades, and baroque details. Shoot during golden hour when light warms the ochres and terracottas; use a 24–70mm and aim for doorways and balconies that frame Afro-Brazilian religious symbols and street musicians. The trick is patience: wait for a local to step into a doorway or for a musician to strike a pose — it adds narrative context without feeling staged.
6) Chapada Diamantina waterfall long exposure
Chapada Diamantina’s waterfalls reward slow photography. Take a neutral density filter and a sturdy tripod: the silky water look is classic here. Compositionally, include foreground rocks or plants to anchor the frame; try 1–4 second exposures for a soft yet textural look. Approach in the morning to avoid harsh mid-afternoon light and crowds.
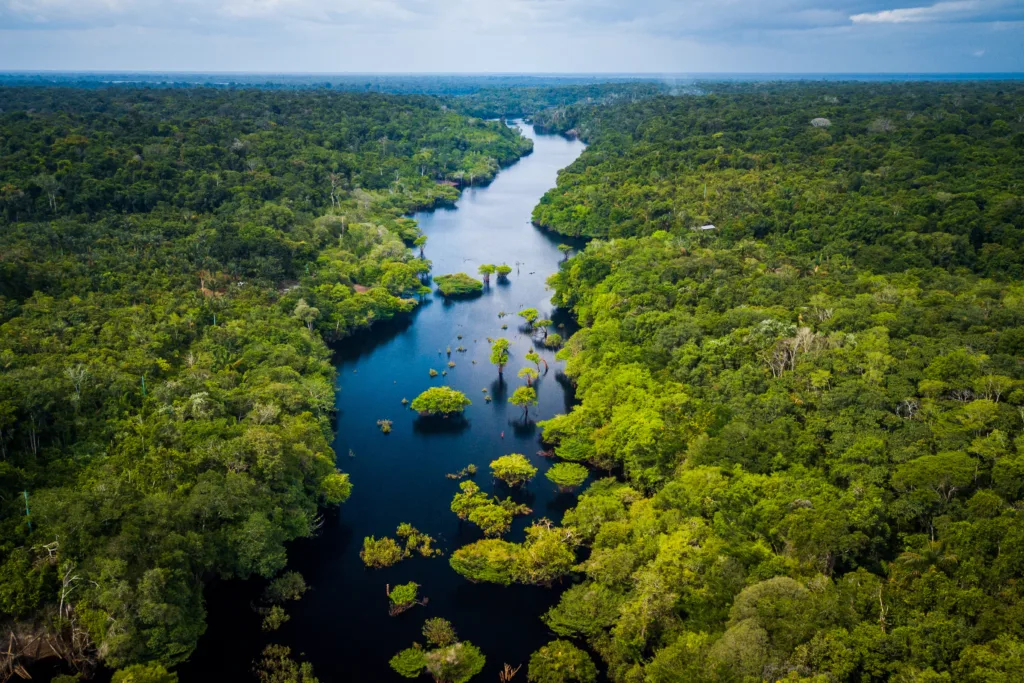
7) Amazon river sunrise with canoe silhouettes (Manaus or near)
You can’t fake the scale and humidity of the Amazon. Sunrise over the river gives a layered silhouette effect: canoes, palms, distant banks and rising mist. I take a 70–200mm to isolate canoes and fishermen against the light and a 24–70mm for the wide river landscape. If you’re staying with a local guide, ask to rise before dawn — fishermen head out early and that’s when the river reveals its colors.
8) Historic Iguazu Cataratas — the devil’s throat from the boardwalk
Iguazu’s power is best shown by proximity. The Devil’s Throat (Garganta do Diabo) boardwalk puts you close enough to feel the spray — use a weather-sealed body, a fast shutter for freezing water droplets, and a polarizer to cut glare. For dramatic wide shots, a 16–35mm or equivalent captures the scale; for details, step back and compress with a 70–200mm to show multiple cascades in the frame.
9) São Paulo skyline at dusk from Praça do Patriarca or Edifício Itália rooftop
São Paulo is an urban beast. The architecture is dense, the light becomes painterly at dusk, and reflections on wet streets add interest. Rooftops yield great geometry: pick a high vantage to isolate blocks of light, and use long exposures to turn traffic into colored streaks. If access to a private rooftop is possible, ask politely and offer prints in return — it’s often appreciated.
10) Serra dos Órgãos ridgeline sunrise — Pedra do Sino viewpoint
For mountain shapes that read like typography, Serra dos Órgãos delivers. Pedra do Sino catches the first light and, on clear mornings, produces layered ridgelines fading into atmospheric perspective. Use a telephoto to compress layers, and anticipate pockets of fog in the valleys during the dry season mornings.
11) Ouro Preto baroque churches and shadow play
The UNESCO-listed streets of Ouro Preto are narrow, cobbled, and full of baroque detail. Shadows fall across carved stone and golden altars. I favor late afternoon when the sun casts long shadows down alleyways and highlights gold leaf inside churches. A 24–70mm lets you move from interior altar detail to exterior urban context quickly.
12) Chapada dos Veadeiros plateau panoramas
Chapada dos Veadeiros is high-altitude cerrado: open plateaus, quartz fields and small waterfalls. The skies are big, so compose low to emphasize grasses and geological formations as foreground anchors. Polarizers intensify the contrast between sky and quartz stones, and near-sunset warms the cerrado’s ochres and reds.
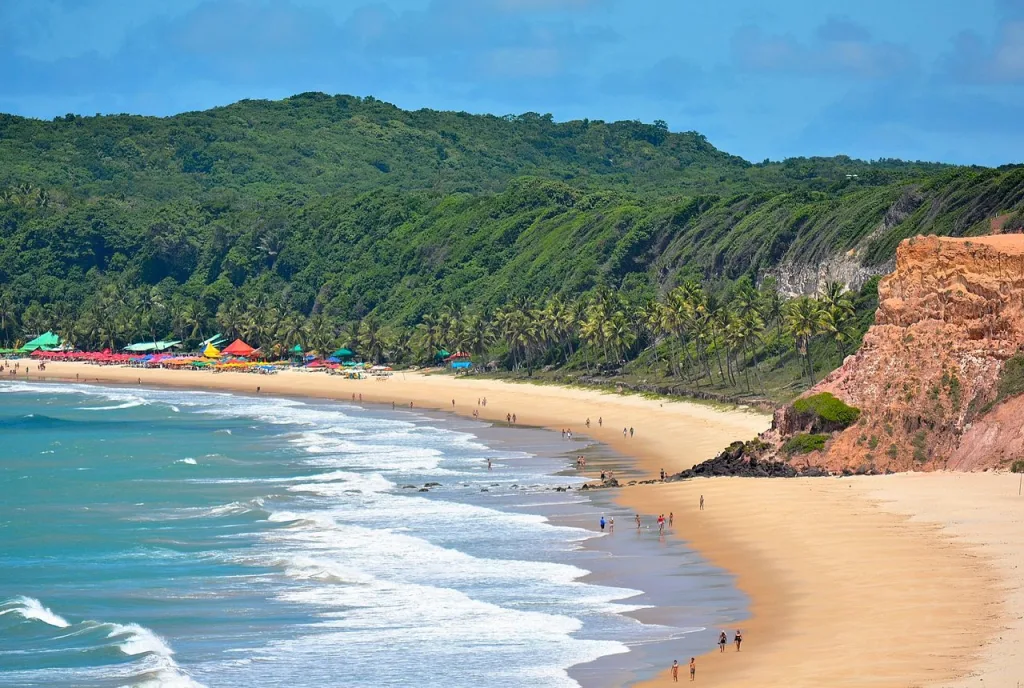
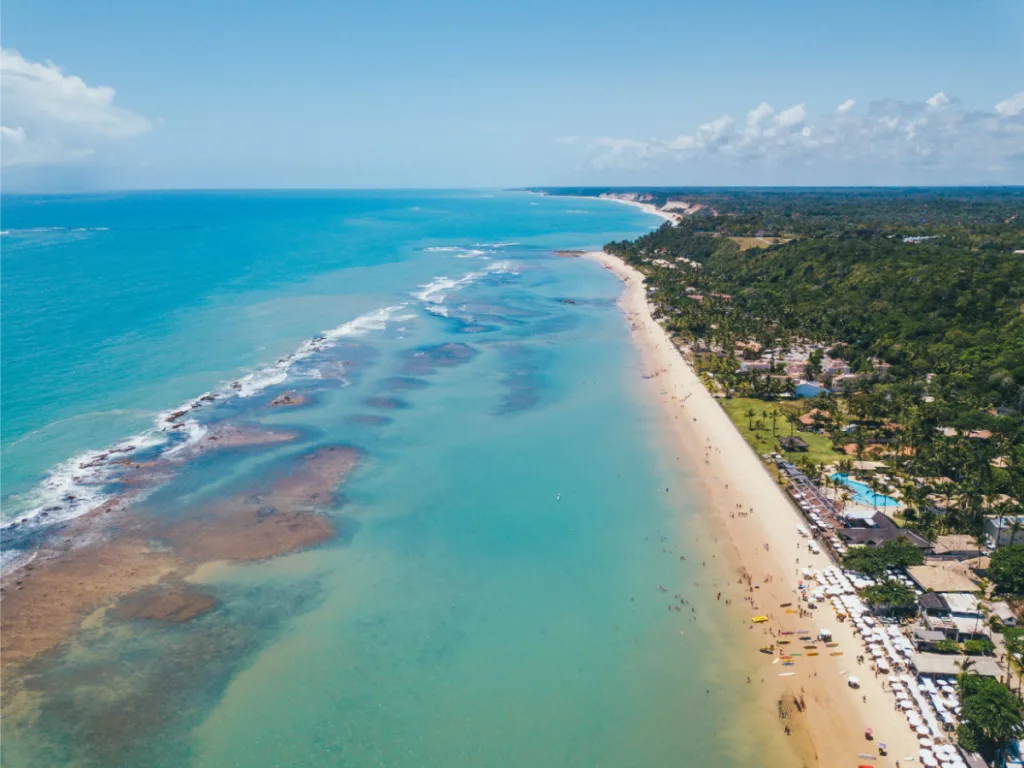
13) Porto de Galinhas tide pools — crystal water and barefoot locals
In Pernambuco, tide pools at Porto de Galinhas are postcard-perfect: clear shallow pools, reef patterns, and fishermen mending nets. Shoot low and close to the water surface for reflections and reef texture; a polarizer removes surface glare to reveal fish and sand formations. Sunrise and late afternoon keep the pools calm and the light soft.
14) Florianópolis surf line-ups and dune mirrors
Floripa offers both surfing culture and sweeping dunes. Early morning surf sessions produce neat action silhouettes and glassy water. For dunes, shoot after light rains when the sand compacts and mirrors small tidal pools. A 70–200mm captures surfers and the compression with distant hills; a 16–35mm is perfect for beach-wide compositions.
15) Gramado/Canela winter mist and small-town Christmas lights
Southern Brazil’s Serra Gaúcha feels different from the rest of the country: European-influenced architecture, pine-lined streets and, in winter, real mist rolling through valleys. If you’re there in July or during the winter festival (when Christmas lights are often installed outside seasonally), shoot wet cobblestones and lit shopfronts at night with a tripod to capture the mood.
How to plan logistics without compromising shots
Transport in Brazil moves at different speeds. Intercity flights save time — domestic airlines have many routes — but slower bus rides expose you to landscapes and allow stopovers for incidental photography. Book local guides in places like the Amazon, Chapada Diamantina and Lencois Maranhenses: they’ll know tides, access rules, and hidden viewpoints. Respect private property and conservation rules; many parks require entrance fees or registration, and drone use is restricted in several protected areas and around urban centers.
Safety, weather and respectful behavior
Photographing people requires consent. In most Brazilian cities, a polite “Posso tirar uma foto?” (May I take your photo?) with a smile works — if you don’t speak Portuguese, show your camera and a thumbs-up. Keep gear secure in busy areas; use a small sling bag rather than leaving equipment visible. Weather is a big variable: northeastern coastlines are sunny much of the year but can have unpredictable cloudbanks; the rainforest is humid and gets afternoon rain. Plan for spare rain covers and wipe cloths for lenses.
Practical camera tips that actually change images
- Use a polarizer on coasts and cerrado to deepen skies and remove water glare.
- Bracket exposures in high dynamic range scenes (sunrise over cityscapes, waterfalls) and blend carefully to retain natural contrast.
- Shoot in RAW. You’ll need the latitude to recover shadows and tame highlights from harsh equatorial sun.
- Approach people; the best portraits come from conversations, not hiding behind a zoom.
- Scout in the late afternoon for compositions you’ll shoot at sunrise — fewer people, similar light directions.

Editing and presenting Brazilian work
Keep colors true to place. Brazil’s light is strong and colors are saturated naturally; over-saturating in post eats authenticity. I use selective vibrance rather than global saturation, and I dodge/burn to guide the viewer’s eye in a frame. For prints, warm up the highlights and keep shadows slightly green-corrected for skin tones shot in dense foliage.
Sequencing a portfolio or photobook
Build a narrative: begin with a quiet wide shot — a city skyline at dawn, a dune field with a single lagoon — then move to detail work: doorways, hands at work, texture. Finish with a human portrait that ties the place back to its people. A well-sequenced portfolio makes people feel they’ve walked the streets with you.
Money, permits and legal notes
Most national parks and ecological reserves require entrance fees and sometimes limits on daily visitors. In tourist hotspots like Fernando de Noronha, the state charges an environmental entrance fee and limits visitor numbers — book ahead if you care about the light and crowds. In cities, commercial shoots often need municipal permits, especially on beaches or public rooftops. For editorial and personal work, standard street photography etiquette applies: ask for permission for close-up portraits, and be ready to share an image as a courtesy.
Two-week sample itinerary for ambitious photographers
Week one: Rio (4 nights) — sunrise at Copacabana and Mirante Dona Marta; midday favela tour; twilight at Sugarloaf. Fly to Salvador (3 nights) — Pelourinho golden hour, market details and nearby beaches for tide pools. Fly north to São Luís and take a guided trip to Lencois Maranhenses (2 nights) to catch dunes at sunrise and midday lagoon colors.
Week two: Fly to Brasilia then to Chapada Diamantina (3 nights) for waterfalls and plateaus; finish with a short flight to Foz do Iguaçu (2 nights) for the falls and Devil’s Throat boardwalk at morning light. This route minimizes backtracking while giving time at each location for dawn/dusk shooting.
Why these 15 images matter for storytelling
These shots span Brazil’s geographic and cultural extremes: Atlantic coastlines, Amazon fog, highland plateaus, colonial towns, dynamic cities. A single photograph of Pelourinho’s colors tells a different story than a long exposure at Iguazu. Taken together, they show how varied and, frankly, surprising Brazil can be if you let go of the obvious first.
If you bring only one thing besides your camera
A good local fixer or guide. They save you time, help with permits, translate, and open doors. I’ve traded prints, emails and sometimes small fees for access that transformed an ordinary trip into a shoot that looks like it took weeks of local connection. Think of the fixer as your single most important lens: they change how the whole country frames for you.
Take one last note: a memorable Brazilian shot is rarely a straight copy of a postcard composition. Respect the obvious, but resist the first shot everyone tries. Walk, talk, wait — and let the country show itself differently to your camera.